Last updated: August 18, 2026
Two people can be quoted very different numbers for what sounds like the same pickleball court installation, and the reason is usually not the materials. It is what the installer has to do before, around, and after the pour: how they get equipment onto the site, how long the base has to cure, whether permits are involved, and whether they are building from bare ground or working on top of something that already exists.
This guide is about that side of the project. It walks through how an installation actually runs, how long each phase takes, and which conditions move the labor portion of a quote. For the full budget with material line items, our pickleball court construction cost guide is the companion piece. Every figure below is an indicative range from published contractor and industry cost guides, and prices vary by region and year.
Quick Answer
What does pickleball court installation cost?
- A professionally installed new outdoor court is commonly quoted around $20,000 to $40,000, with larger or more complex projects running considerably higher.
- Installing on an existing tennis or sport court surface is far cheaper, generally around $5,000 to $12,000, and simple restriping is often around $800 to $2,000.
- Expect roughly one to two weeks of on-site work once materials arrive, but four to twelve weeks for the whole project once permitting, curing time, and weather are included.
Indicative ranges from contractor and industry cost guides. Site access, soil, permits, and regional labor rates all move them.
What Installation Covers, Phase by Phase
Installation is the labor and sequencing half of a court project, distinct from the materials themselves. The table below lays out the standard phases in order, with the typical duration of each. The total elapsed time is almost always longer than the sum of the working days, because curing and inspection windows sit between the active phases.
| Phase | Typical duration | What happens |
|---|---|---|
| Design and permitting | Days to several weeks | Layout, drainage plan, municipal permit and HOA approval where required |
| Excavation and grading | 1 to 3 days | Clearing, cutting to grade, compacting the subgrade, drainage provision |
| Base installation | 1 to 3 days | Forming and pouring concrete, or laying and rolling asphalt |
| Curing | Often around a month for new concrete | The slab has to cure fully before acrylic surfacing can be applied |
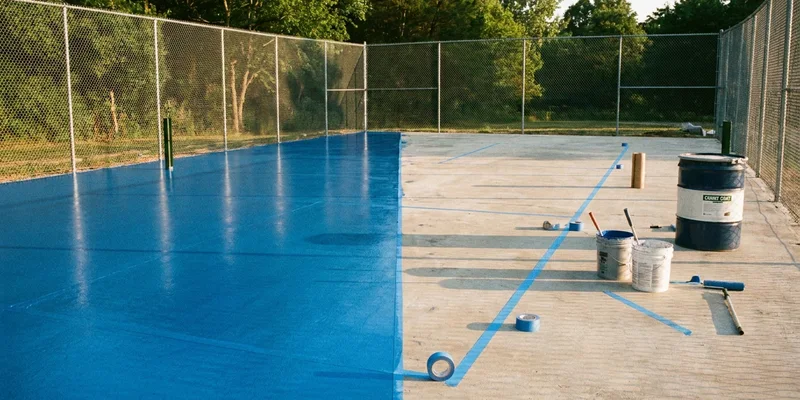
| Surfacing and striping | 2 to 4 days | Resurfacer coats, color coats, then line striping in a contrasting color |
| Net, fencing, lighting | 1 to several days | Post setting, fence erection, electrical work where lighting is included |
How an Installation Actually Runs
The sequence rarely changes, because each step depends on the one before it. The installer starts by staking out the footprint and confirming the drainage direction, then excavates and grades. Getting the fall right at this stage is the whole job: a court that holds water anywhere will fail early no matter how good the surfacing is.
Once the subgrade is compacted, the base goes in. Concrete is formed, poured, and finished; asphalt is laid and rolled. Then the project pauses, sometimes for weeks, while the base cures or settles enough to accept the coating. Only after that do the acrylic layers and lines go down, followed by net posts, fencing, and any electrical work.
Why the Timeline Is Longer Than the Work
Active construction on a single court is short, commonly one to two weeks of crew time once materials are on site. The reason people report four to twelve week projects is everything that sits around that work: permit review, contractor scheduling, curing windows, and weather.
Weather Is the Biggest Variable
Concrete pours and acrylic surfacing both have temperature and moisture requirements, and a wet or cold week simply stops the job. In northern climates the practical building season is limited, which compresses demand into a few months and lengthens lead times. Booking outside peak season is one of the few reliable ways to shorten a schedule and occasionally to improve a quote.
What Moves an Installation Quote
Five conditions explain most of the difference between two quotes for a similar court. Site access comes first: a backyard that a concrete truck and excavator can reach directly is far cheaper to work than one requiring small equipment, hand barrowing, or a pump truck. Ground conditions come second, since rock, clay, high water tables, and slope all add excavation and drainage labor.
The remaining three are regional labor rates, which vary widely across the country, project scale, since two courts built together cost less per court than one built alone, and scope creep from optional items like full-height fencing, lighting, seating, or shade structures. None of those change the size of the court, but together they can move a quote by tens of thousands of dollars.
Installing on a Surface That Already Exists
The cheapest installation is the one that skips excavation and base work entirely. Putting a pickleball court onto an existing tennis court, sport court, or sound slab is commonly quoted around $5,000 to $12,000, because the labor is limited to repair, resurfacing, striping, and net provision. A single tennis court has room for multiple pickleball courts, which is why so many clubs have converted rather than built.
The catch is that the existing surface has to be genuinely sound. A slab with structural cracking, settlement, or drainage problems will telegraph those flaws straight through a new coating, and any installer worth hiring will say so before quoting. If the base needs replacing, you are back to a full build. Note that a converted tennis court also needs the net lowered to pickleball height, which our net height guide covers in detail.
Permits, HOA Rules, and Inspections
A permanent court is a structural improvement in most jurisdictions, which means the permitting step is real and can add weeks. Municipalities differ on what they require, but setbacks from property lines, impervious surface limits, drainage plans, and lighting restrictions are the conditions that come up most often for residential courts.
Homeowners associations add a second layer, and their rules on fence height, lighting, and hours of use are often stricter than the municipality’s. Both should be checked before you take quotes, not after, because a condition discovered late can force a redesign that changes the whole cost picture.
What a Good Quote Should Itemize
Comparing installers is only possible if their quotes break out the same items. Ask each to separate site preparation and drainage, base material and thickness, surfacing specification including the number of coats, striping, net system, fencing, lighting, and permit handling. A single lump sum tells you nothing about where the money goes or what has been left out.
Two specifics are worth insisting on. First, the drainage plan in writing, because that is what determines whether the court survives its first decade. Second, the surfacing specification by coat count and product line rather than just a color, since the difference between a thin and a full-specification coating system is invisible on day one and obvious a few seasons later.
Doing Part of It Yourself
Full do-it-yourself construction is rarely realistic, because concrete finishing and acrylic surfacing both require specific equipment and experience, and mistakes at those stages are expensive to undo. What homeowners can reasonably take on is the perimeter work: clearing, some landscaping, fence installation on straightforward ground, and sourcing the net system separately rather than through the contractor.
A genuinely low-budget option that skips installation altogether is a portable setup on an existing driveway or slab, with taped or chalked lines and a freestanding net. It gives up permanence and a true playing surface, but for casual backyard play it removes the entire construction cost. Our pickleball net guide compares portable and permanent systems if that is the direction you are leaning.
Frequently Asked Questions
How much does it cost to install a pickleball court? A professionally installed new outdoor court is commonly quoted around $20,000 to $40,000, and installations on an existing sound surface are usually around $5,000 to $12,000. These are indicative ranges from published cost guides and vary by region and year.
How long does pickleball court installation take? Active on-site work is often one to two weeks, but total project time is commonly four to twelve weeks once permitting, curing, scheduling, and weather delays are included.
Why does concrete need to cure before surfacing? Acrylic coatings need a fully cured, dry slab to bond properly. Contractors commonly wait around a month after a new concrete pour before applying the surfacing system.
Is installation cheaper if I build more than one court? Yes. Mobilization, equipment transport, and site preparation are shared across the project, so the per-court cost of two or more courts built together is lower than a single court alone.
Can a contractor install a court on my existing driveway? Sometimes, if the slab is sound, level, and large enough for the playing area plus run-off space. A driveway with cracking, settlement, or a steep slope is usually not a suitable base.
What is the most common reason an installation goes over budget? Unexpected site conditions. Rock, poor soil, drainage problems, and difficult equipment access are discovered during excavation and add labor that no quote can fully predict in advance.
The Bottom Line
Pickleball court installation cost is driven by site conditions and labor rather than by the court itself. A new build is commonly quoted around $20,000 to $40,000 and takes four to twelve weeks end to end, while installing onto a sound existing surface can be a fraction of that at roughly $5,000 to $12,000. Get itemized quotes, insist on a written drainage plan, and check permits before you take estimates. For the full material budget behind these numbers, see our construction cost breakdown.